Skipping Stones: Reach the Six-Treasure Starting Setup
A preparation route to the first treasure starting picture. Track the two stones across the crossing, bring the orange-bank stone back to the pale bank, and compare the final state before opening the treasure steps.
The recorded route is checked against P6; the source build and current-version reproduction remain unverified.
Follow the matching entrance into the boat-side room, then prepare the pale and orange islands for Treasure 1. S1/S2 label the opening stones; R1/R2 label the later treasure-route stones. Use the stopping conditions, not the video timestamps, to decide when to continue.
Continue with the existing Treasure 1 steps after matching the final setup →Circles locate objects in this picture. Source time is evidence location, not a waiting duration.
From the opening checkpoint to the Treasure 1 setup
A route from the opening room to the Treasure 1 starting layout. The opening uses the later replay after the video resets; you do not need to repeat the earlier demonstration or its reset.
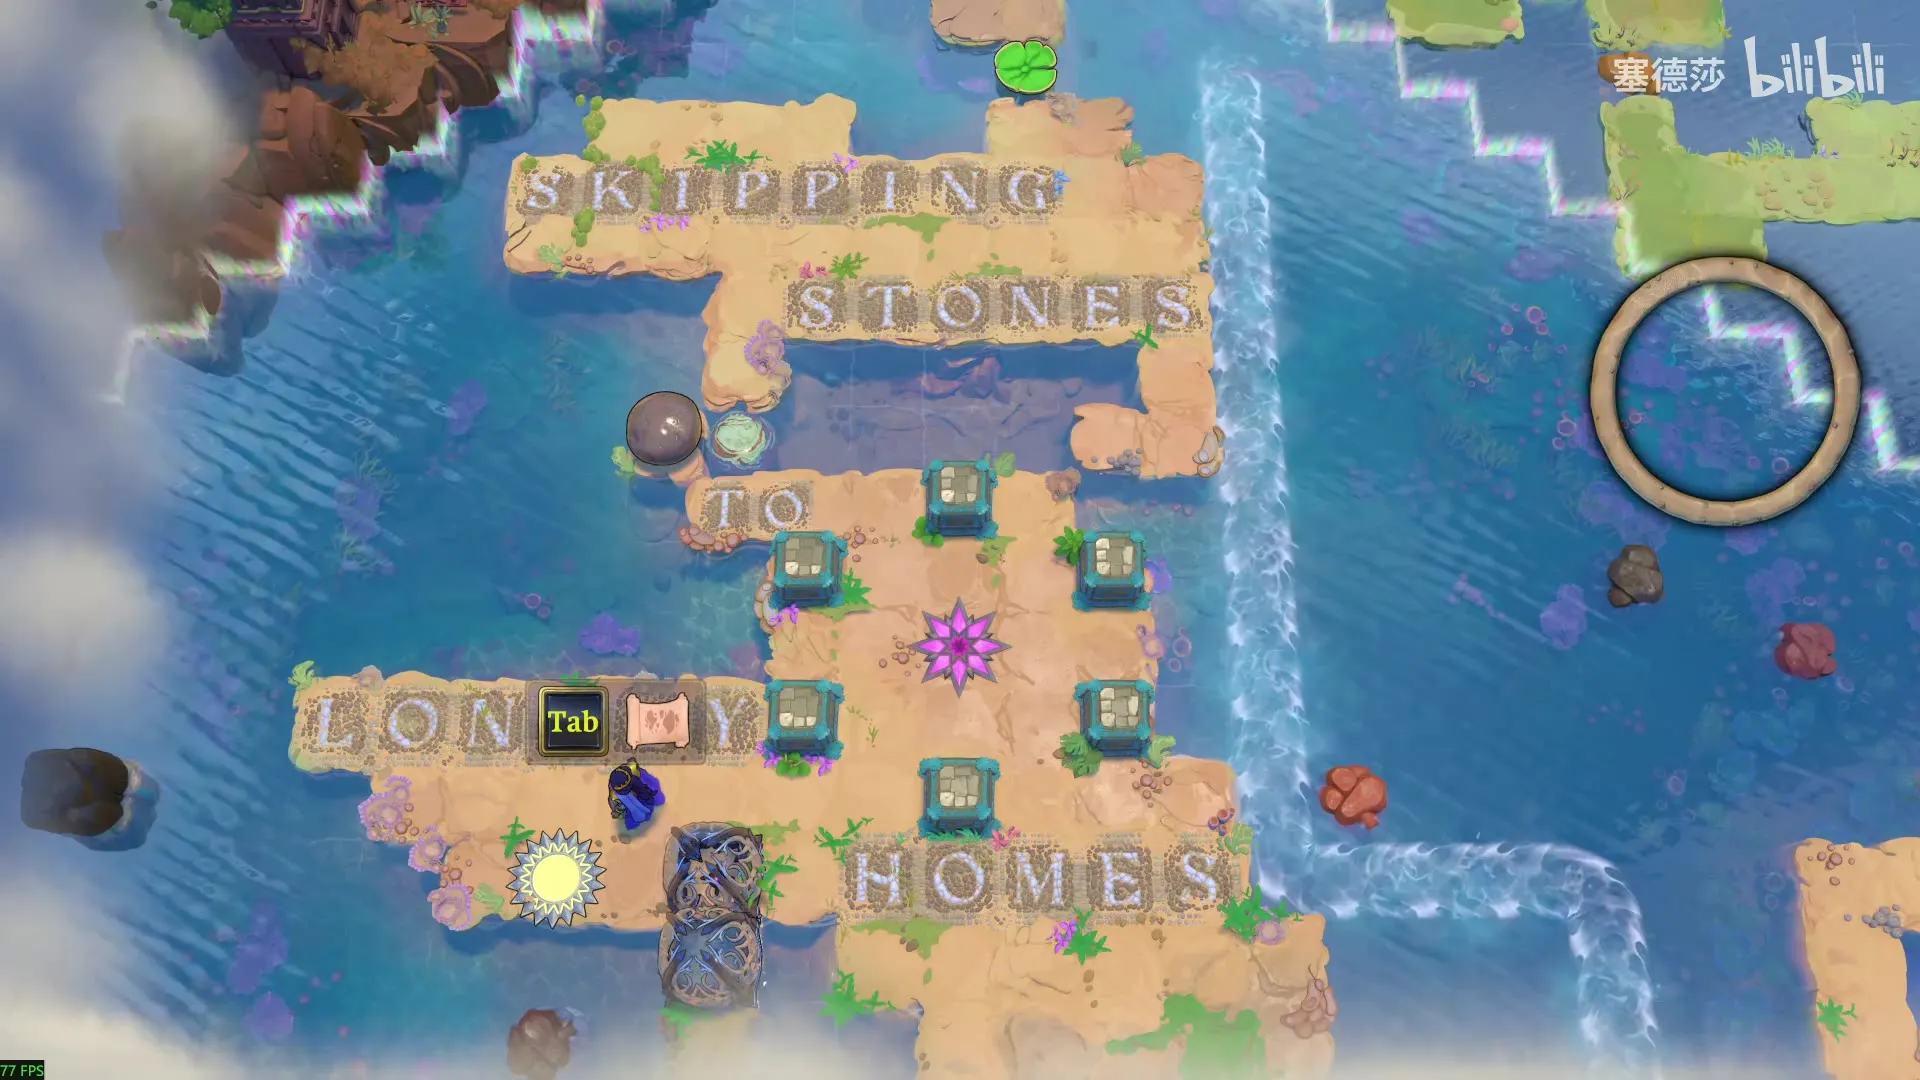
Before following the route
A light hint
The stone that first opens the crossing is not the stone you later launch from the pale bank.
What changes during this route
A stone carried around the current arrests the two left pads. The orange-spur stone is then sent back to the pale bank. The original footage also includes exploratory pushes and undo; these are labelled rather than turned into a required recipe.
Start from the matching pictured layout. A different save state may need a different preparation or recovery route.
-
1 Cross the opening boat-side room
02:40–03:00.5Stage checkpointWait until S1 settles against the checkpoint bank rather than following it into the water.
-
1.1 Find the two opening stones
Starting layout — later replay · P6 02:40 Watch P6 · 02:40–02:55 ↗DoUse S1 beside the boat-side bend and S2 on the lower-right spur. Walk to the lower side of S2.
Wait / checkLeave the distant top stone and the far-left lower stone alone. The two named stones should still match this layout.
You should seeYou can stand directly below S2 without moving S1.
-
1.2 Push S2 up onto the narrow row
Before the move · P6 02:55 Watch P6 · 02:55–02:56 ↗DoStand below S2 and push it upward once onto the horizontal connecting row.
Wait / checkStop on the row; do not launch S2 into the water above it.
You should seeS2 is aligned with the path leading left into the middle platform.
-
1.3 Bring S2 left into the middle
Before the move · P6 02:56 Watch P6 · 02:56–02:57 ↗DoWalk around the right of S2 and push it left along the narrow row onto the middle platform.
Wait / checkStop with S2 on the right-hand part of the middle platform. Keep S1 beside the water notch.
You should seeS2 is parked on the middle platform; S1 is still to its upper-left.
-
1.4 Send S1 across the small notch
Before the move · P6 02:57 Watch P6 · 02:57–02:58 ↗DoGo to the right side of S1 and push it left across the narrow water notch to the boat-side strip.
Wait / checkS2 stays on the middle platform. Wait for S1 to stop on the strip.
You should seeS1 is on the vertical strip immediately below the boat.
-
1.5 Move S1 up beside the boat
Before the move · P6 02:58 Watch P6 · 02:58–02:59 ↗DoWalk around the bottom of the notch, stand below S1 and push it up one tile.
Wait / checkStop beside the boat, aligned with the bottom tile of the checkpoint bank across the stream.
You should seeYou can get to the left side of S1 to launch it right.
-
1.6 Launch S1 to the checkpoint bank
Before the move · P6 02:59 Watch P6 · 02:59–03:00.5 ↗DoStand to the left of S1 and push it right across the stream. Stay on your bank.
Wait / checkWait until S1 settles against the checkpoint bank rather than following it into the water.
You should seeS1 stops at the lower tip of the checkpoint bank; S2 remains on the middle platform.
-
-
2 Reach the checkpoint and reserve the boat-side stone
03:00.5–03:10Stage checkpointWatch S1 cross above the boat and stop on the long bank on the left.
-
2.1 Bring S2 back to the stream
Before the move · P6 03:00.5 Watch P6 · 03:00.5–03:01.5 ↗DoReturn to the left side of S2 and push it right along the narrow row to the right-hand spur.
Wait / checkAlign S2 directly below S1 across the small water gap.
You should seeS2 is at the right edge of the row, ready to push upward.
-
2.2 Push S2 into the gap
Before the move · P6 03:01.5 Watch P6 · 03:01.5–03:03 ↗DoWalk below S2 and push it upward into the stream beneath S1.
Wait / checkWait for S2 to settle in the gap. Keep the upper stone S1 in front of you.
You should seeS2 makes the crossing to the checkpoint bank possible.
-
2.3 Cross and push S1 to the top of the bank
Before the move · P6 03:03 Watch P6 · 03:03–03:07 ↗DoWalk up over the settled S2, then keep pushing S1 upward along the checkpoint bank until it reaches the top tile.
Wait / checkS2 stays in the crossing gap. Stop before pushing S1 off the top edge.
You should seeYou are on the checkpoint bank with S1 at its top-left edge.
-
2.4 Send S1 left to the boat-side bank
Launch and landing — fixed bank landmarks · P6 03:08 Watch P6 · 03:08–03:10 ↗DoStand to the right of S1 and push it left. Remain on the checkpoint bank.
Wait / checkWatch S1 cross above the boat and stop on the long bank on the left.
You should seeS1 is reserved beside the boat. S2 remains in the crossing gap.
-
-
3 Reach the two-bank puzzle and prepare R1
03:29–03:45Stage checkpointKeep R1 on land and stop at the lower launch row.
-
3.1 Leave by the checkpoint path
Route landmark · P6 03:29 Watch P6 · 03:29–03:35 ↗DoFrom the checkpoint, follow the narrow path to the right, then down the far side. The camera pans as you enter the next island group.
Wait / checkUse the checkpoint and the crossing stone behind you as landmarks; the camera movement is not a change of world direction.
You should seeThe pale island appears on your left, opposite an orange island with another stone.
-
3.2 Switch to the treasure-route stone labels
Starting layout · P6 03:39 Watch P6 · 03:35–03:43 ↗DoIdentify R1 on the pale bank and R2 on the orange lower spur. These are different stones from the opening S1 and S2.
Wait / checkDo not move R2 yet. Start with R1 beside the pale bank’s central water notch.
You should seeYou can match both stones before preparing the current route.
-
3.3 Move R1 left one tile
Before the move · P6 03:43 Watch P6 · 03:43–03:44 ↗DoStand on R1’s right side and push it left once.
Wait / checkStop on the pale strip where there is room to stand above the stone.
You should seeR1 is on the left column of the lower pale landing.
-
3.4 Bring R1 down to the launch row
Before the move · P6 03:44 Watch P6 · 03:44–03:45 ↗DoWalk above R1 and push it down to the bottom tile beside the two moving pads.
Wait / checkKeep R1 on land and stop at the lower launch row.
You should seeYou can stand on the left of R1 with open water to its right.
-
-
4 Send R1 around the current
03:50.5–04:02.5Stage checkpointWait until R1 is beside the landing. The pads continue to gather below it; check the pair again before crossing.
-
4.1 Launch R1 right toward the current
Before the move · P6 03:50.5 Watch P6 · 03:50.5–03:55 ↗DoStand left of R1 and push it right into the water, as in the later launch shown here.
Wait / checkStay ashore. The earlier launch at about 03:47 is undone; it is not an extra required move.
You should seeR1 travels right toward the current on the far side of the pool.
-
4.2 Wait at the upper landing
Ready to push — after the current · P6 04:02.5 Watch P6 · 03:55–04:02.5 ↗DoWalk up the pale island to the narrow upper landing while the current carries R1 upward.
Wait / checkWait until R1 is beside the landing. The pads continue to gather below it; check the pair again before crossing.
You should seeR1 is within reach from the pale upper landing. The next move clears the crossing for the pads.
-
-
5 Push R1 onto the orange bank and cross
04:02–04:05Stage checkpointKeep both pads together. Stop on the orange bank rather than pushing R1 further.
-
5.1 Push R1 right onto the orange bank
Before the move · P6 04:02 Watch P6 · 04:02–04:03.5 ↗DoFrom the pale upper landing, push R1 right across the stream onto the orange bank.
Wait / checkLet R1 settle on orange land. The paired pads remain at the crossing.
You should seeR1 is on the upper-left orange tile.
-
5.2 Cross over the paired pads
Before the move · P6 04:03.5 Watch P6 · 04:03–04:05 ↗DoStep right onto the upper pad, down onto the lower pad, then right onto the orange bank.
Wait / checkKeep both pads together. Stop on the orange bank rather than pushing R1 further.
You should seeYou are across the stream with R1 above you and R2 on the lower spur.
-
-
6 Clear the orange approach while keeping R1 on land
04:24.5–04:30Stage checkpointStop before the right edge. The recording overshoots and undoes a move around 04:28; that detour is unnecessary.
-
6.1 Move R1 down one tile
Before the move · P6 04:24.5 Watch P6 · 04:24.5–04:25.5 ↗DoStand above R1 and push it down one tile on the orange bank.
Wait / checkLeave R2 on the lower spur. Do not push R1 back into the stream.
You should seeR1 is now on the row across the orange centre.
-
6.2 Park R1 in the orange centre
Before the move · P6 04:26 Watch P6 · 04:25.5–04:30 ↗DoWalk around the lower side of R1 to its left, then move it right to the centre tile shown by the arrow.
Wait / checkStop before the right edge. The recording overshoots and undoes a move around 04:28; that detour is unnecessary.
You should seeR1 stays in the orange centre. The route down to R2 is clear.
-
-
7 Launch R2 back to the pale bank
04:35.5–04:39.5Stage checkpointUse the pair beside the pale upper platform. Do not push either pad.
-
7.1 Send R2 to the pale bank
Before the move · P6 04:35.5 Watch P6 · 04:35.5–04:37 ↗DoStand to the right of R2 on the orange lower spur. Push it left across the water. Leave R1 in the orange centre.
Wait / checkStay on the orange bank while R2 crosses and comes to rest.
You should seeR2 stops on the lower pale landing across the channel.
-
7.2 Walk back across the two pads
Before the move · P6 04:37.5 Watch P6 · 04:37.5–04:39.5 ↗DoWalk to the orange bank beside the lower connecting pad. Step left onto it, go up to the upper pad, then left onto the pale bank.
Wait / checkUse the pair beside the pale upper platform. Do not push either pad.
You should seeYou are back on the pale upper platform; R2 stays on the lower landing.
-
-
8 Route R2 through the pale island
04:39.5–04:52.5Stage checkpointStop on the upper row. Do not push it down or across to the orange bank.
-
8.1 Push R2 up along the land
Before the move · P6 04:41.5 Watch P6 · 04:39.5–04:47 ↗DoWalk down the pale bank and around R2 to its lower side. Push it up twice along the narrow land.
Wait / checkStop at the junction beside the small water notch, as marked by the arrow tip.
You should seeR2 is on the junction; you can walk around its lower-right side.
-
8.2 Send R2 left across the notch
Before the move · P6 04:47 Watch P6 · 04:47–04:48 ↗DoWalk around to the right of R2. Push it left across the small water notch.
Wait / checkLet it stop on the narrow vertical strip on the left. Walk around the bottom of the notch to follow it.
You should seeR2 is on the left strip, with a land tile immediately above it.
-
8.3 Move R2 to the top of the strip
Before the move · P6 04:48 Watch P6 · 04:48–04:48.5 ↗DoGet below R2 and push it up one land tile.
Wait / checkStop before moving around to its left side.
You should seeR2 lines up with the curved pale bank across the water to the right.
-
8.4 Skip R2 right to the curved bank
Before the move · P6 04:48.5 Watch P6 · 04:48.5–04:49.6 ↗DoStand on the land to the left of R2. Push it right across the notch.
Wait / checkWait on land until R2 reaches the curved bank on the right.
You should seeR2 rests below the broad upper platform.
-
8.5 Bring R2 onto the upper platform
Before the move · P6 04:50 Watch P6 · 04:49.6–04:51.5 ↗DoWalk around the bottom of the notch and up the right-hand land. From below R2, push it up onto the broad platform.
Wait / checkKeep R2 on land; do not send it toward the pads.
You should seeR2 is on the upper platform, left of its final starting tile.
-
8.6 Shift R2 one tile right, then stop
Before the move · P6 04:51.5 Watch P6 · 04:51.5–04:52.5 ↗DoWalk around to the left of R2 and push it right once.
Wait / checkStop on the upper row. Do not push it down or across to the orange bank.
You should seeR2 is on the upper starting tile used by Treasure 1.
-
-
9 Check the prepared layout and continue to Treasure 1
04:52–05:09.5Ready for Treasure 1Check the three marked objects before opening Treasure 1: R2 is A on the pale upper tile; R1 is B in the orange centre.
Continue to Treasure 1 →-
9.1 Match A, B and the connecting pads
Prepared state — before the later trial · P6 04:52 Watch P6 · 04:52–05:09.5 ↗DoCheck the three marked objects before opening Treasure 1: R2 is A on the pale upper tile; R1 is B in the orange centre.
Wait / checkKeep the connecting pads together. The later down/right trial and undo sequence is not part of this preparation.
You should seeThis is the prepared stone layout. Continue with the existing Treasure 1 guide.
-
Check the observed outcome
At P6 04:52, R2 is on the pale upper tile (A), R1 is in the orange centre (B), and the two connecting pads remain together. This layout is also restored after the later trial and undo. Stop at this layout and follow Treasure 1; the later trial is not preparation.
Sources
Updated 2026-10-15. Version limits are noted beside the advice they affect.